Using a VPN service is very important when you want a more security and privacy when browsing the internet. However, VPN services are a bit expensive and not always very reliable in terms of how secure your data is stored. With that in mind, I’m going to describe how you can leverage the AWS free-tier to create your own VPN server using an EC2 instance and have full control over the data that is flowing through.
For such, you will need to setup an AWS account in order to be eligible for the free tier services, and then launch an EC2 instance in the desired region using the OpenVPN custom AMI, for example: let’s say you are in Canada and wants a VPN to access a website that is only available for those accessing from Brazil, so you will need to spin up an EC2 instance in South America (São Paulo) region.
So please check below the steps to achieve it:
Launching the EC2 instance
Log into your AWS console and select the region where you want your VPN to be created (in my case South America/São Paulo).

Go to the EC2 service and click on Launch instances

The options that you need to setup when configuring your EC2 instance are:
Define a Name for your instance:

Search for openvpn AMI:

Select the first option from the search result (OpenVPN Access Server):

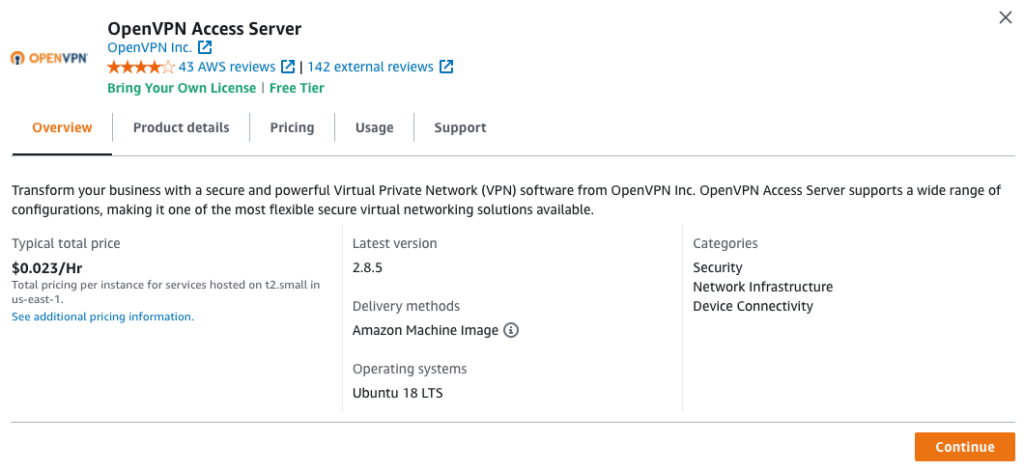
Review the details of the image and click Continue:

Click on Confirm Changes:

Select t2.micro for the Instance type:

Click on Create new key pair link to create a new key pair (you can select your own if you have one already created):

Provide a Key pair name and click Create key pair button (the download will start automatically):

On the right-hand side, confirm the instance options and click on Launch instance button:

Wait until your instance is Running and Status check is passed:

Connect to your EC2 instance
Move the downloaded key pair file to your .ssh folder (the command below should work on both Mac and Linux. If you’re using Windows, you can either use copy command or Windows Explorer):
mv ~/Downloads/my-vpn-server-key-pair.pem ~/.sshChange the permission of the file, otherwise you won’t be able to connect to the instance:
chmod 400 ~/.ssh/my-vpn-server-key-pair.pemSSH to your newly launched instance:
ssh -i "~/.ssh/my-vpn-server-key-pair.pem" root@<YOUR-EC2-INSTANCE-PUBLIC-DNS>In case you aren’t able to connect to your instance, please check the AWS official documentation.
Configure the OpenVPN server
Accept the agreement by typing yes:

Press Enter to define it as the primary Access Server node:

Press Enter to select all interfaces to by used by the Admin Web UI:

Press Enter to use 943 as the default port for the Admin Web UI:

Press Enter to use 443 as the default TCP port number for the OpenVPN Daemon:

Type yes to define that client traffic must be routed by default through the VPN:

Press Enter to not select DNS traffic to be routed through the VPN by default:

Press Enter to use local authentication via internal DB:

Press Enter to allow clients to access private subnets:

Press Enter to use openvpn as the default login to the Admin UI:

Leave Activation key blank:

Wait for the configuration to complete and take note of the Admin and Client UIs:

SSH again into your instance but now using openvpnas user:
ssh -i "~/.ssh/my-vpn-server-key-pair.pem" openvpnas@<YOUR-EC2-INSTANCE-PUBLIC-DNS>Define a password for openvpn user (this is the username and password that you will use to connect your local computer to the VPN server):
sudo passwd openvpn
Install OpenVPN client in your local machine
Using your browser, type the Client UI URL that was displayed after the server configuration was completed and log in using openvpn credentials:

After the login, download openvpn client for your operating system (if you already have the client installed, you can just download you profile and import it into the openvpn client):

Open the client and connect to your newly created VPN:

Confirm that your VPN is working by checking if your IP address is the same as your EC2 public IP:

Congratulations! You have a personal VPN server that will be free for the 12-month period that AWS free-tier provides you. Please keep in mind that, if you stop your instance, when you start it again your public IP might change, so you’ll need to configure your client again.